It shouldn’t take too long for you to notice that I am obviously not an expert at prop or costume making. I wouldn’t even say I am very good. Honestly even the word amateur seems a bit too kind as this was my first real go at doing anything like this using these materials. Still, I learned a lot and had a blast during the process of making this thing, so I figured I’d throw this online to maybe help others who want to do a better job than I did. Looking back, I realize that I didn’t document everything nearly as well as I would have liked, so you’ll have to forgive the lack of a ton of in-process photos. Also, I’ll do my best to throw links throughout this post to the various websites that I found helpful along the way.
So, my daughter Lily decided earlier this year that she wanted to be Loki for Halloween. I am a huge cosplay fan and have always wanted to try my hand at making something that looked cool out of foam and Worbla. After a bit of back and forth with my wife about how overboard we were willing to go with it, we set about making plans. We knew from the outset that this was a pretty big job what with all the armor and sewing and everything, so we set about doing our homework. As I said – I’ve never really done anything like this before, so to learn the various processes I started searching for advice/tips/tricks on cosplay forums, YouTube videos on costume and prop making, pics and guides on Pinterest and DeviantArt… basically everything that I could find about making armor and making patterns of things. In the end, my wife wound up making the majority of the leather and cloth bits while my main focus was on the armor and helmet.
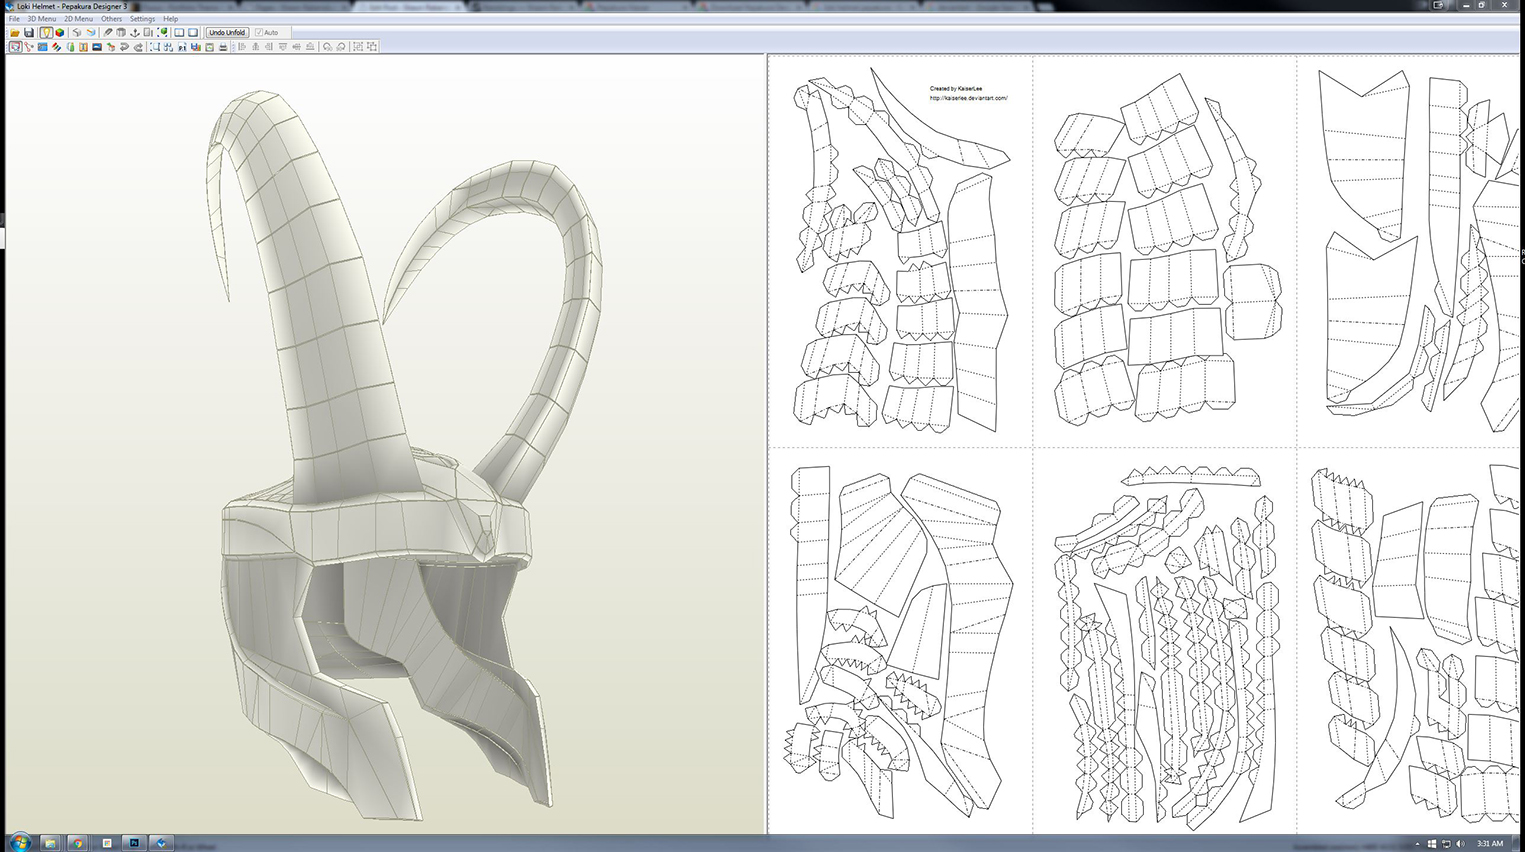
I started with the helmet. In my opinion, the helmet is pretty much the most instantly recognizable thing about Loki, and if I wasn’t going to be able to get that part of the costume to a point of looking halfway decent then I’d like to know early on so there is still time to convince my daughter to be something else for Halloween. To get a feel for the size of everything, I installed the papercraft software Pepakura Designer 3 and downloaded KaiserLee’s Loki Helmet Design from DeviantArt. After printing everything out on some heavy card stock and spending a few hours cutting and taping pieces together, I had the basic horn shapes. It was tempting to just make some basic horns and go from there, but the way the horns curve is pretty distinctive and I wanted to replicate it as much as possible. The problem was that the horns don’t just curve up and out from where they are connected to the helmet, but also curve outwards at the midpoint of the horn and then back inwards towards the tips. Hopefully that makes some sense.
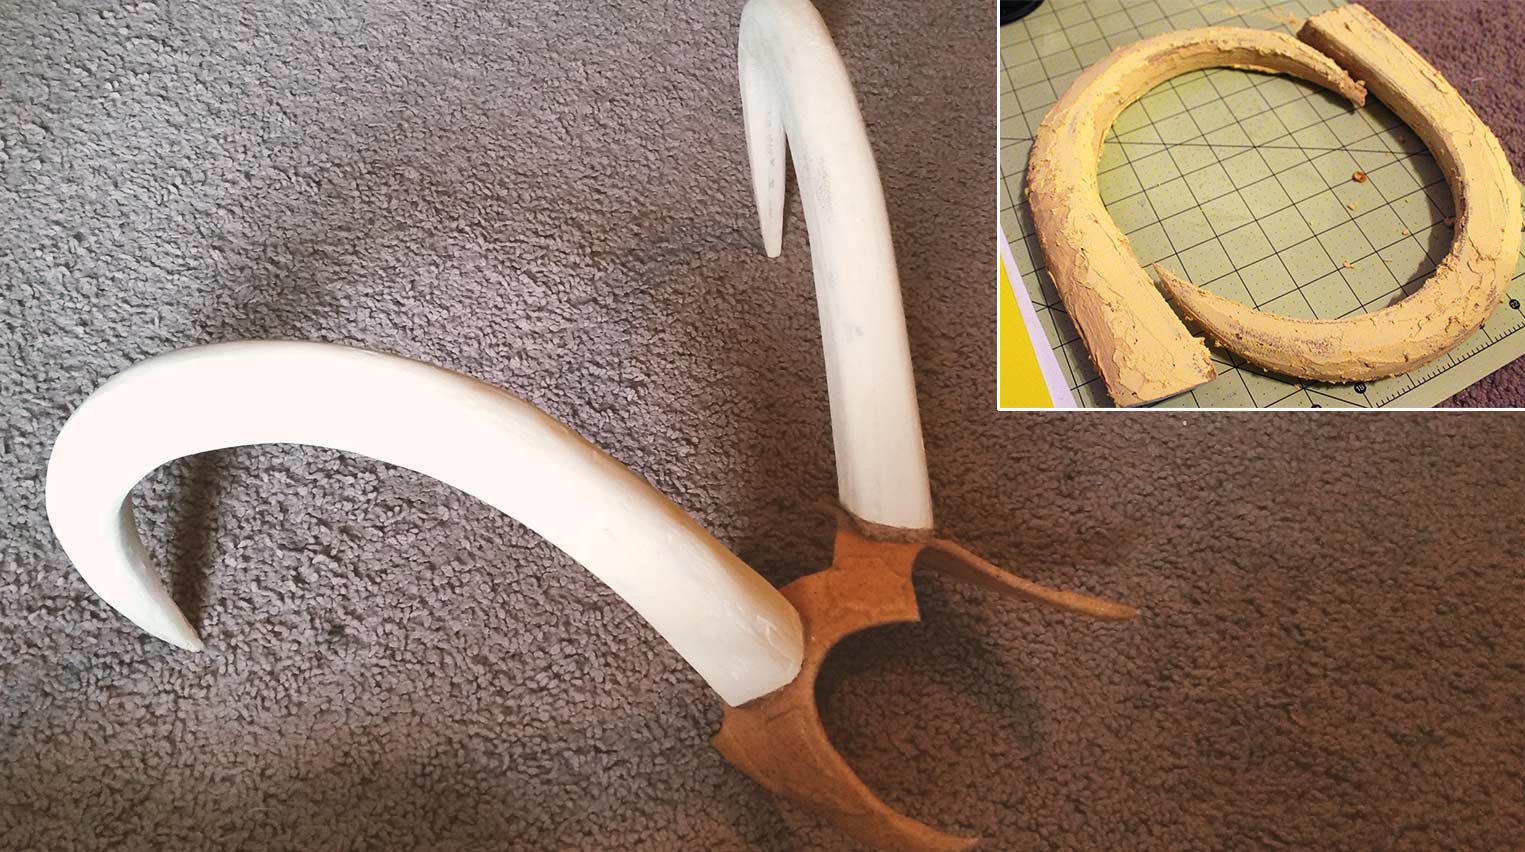
So, now that I knew the rough size and shape that the horns needed to be, it was time to make them. I decided to make the core out of insulation foam to keep it nice and lightweight. Everywhere that I found online suggests using the pink type of foam, but all I could find at my local hardware store was blue. I am not sure if there is any difference between the two colors – but the blue foam worked just fine. The sheet I purchased was about $20 and was 1 inch thick and 4′ x 8’… way more foam than I needed. Luckily one of the employees helped me chop it up right there in the store so that it would fit into the trunk of my car. While I was there, I also picked up a decent utility knife and some extra blades. When I got home I spent a good deal of time sitting in the floor watching The X-Files and practicing carving on a spare piece of foam to get the hang of it. Its a bit trickier than it looks like it would be and it’s pretty easy to get carried away and carve off more than you meant to. So…. be careful. Keep in mind that you can sand this foam – so make your cuts close to where you want them and use sandpaper or a rasp or something to fine tune.
Since the horns are thicker than the 1 inch foam that I bought, I had to use some hot glue to glue a couple pieces of foam together to get the material thick enough. I wish that I had thought about this beforehand though, because when you are cutting and sanding the foam into shape, hot glue dries pretty hard and is terrible to try to get through with sandpaper or a knife. In retrospect, I probably should have just gotten some 2 inch thick foam and left the glue gun in the closet. Ah well. So, once I had the basic outline of the horn shapes cut out and glued up, I set about trying to shape them into actual horns.
I wanted the horns to be exact mirror copies of each other, and unfortunately I don’t have any real power tools (belt sander or something would have been insanely handy here). Doing it all by hand and getting the two horns to match up identically was MUCH more difficult than I anticipated. Basically, you have to go back and forth between the two horns doing a bit of work, then looking at the other horn and replicating the work you just did. I spent an entire day in my friends garage sanding one horn, comparing, sanding the other horn, comparing, etc. until I finally had them pretty dang close. Even after this time, they still weren’t “finished”. After sizing them up to my daughters head, they were way too big at the base because I hadn’t been paying a ton of attention when I was drawing my guidelines on the foam.

So, after a ton more shaping, sanding, cutting, etc. to get them to the point that I wanted them it was time to figure out what to attach them to. Somewhere in here we picked up one of those styrofoam heads from our local Hobby Lobby – something I could draw patterns and stuff on to spare my child’s face. After a ton of looking around online at Lady Loki costumes, I decided on a diadem style of headpiece rather than a full helmet and spent a few hours going back and forth on sketches. When I finally had the basic shape figured out, I used a bit of craft foam and cut out the template. I wanted all of the additional shapes in the design to be raised (to give it a bit more detail and depth), so those shapes were also cut out of an additional piece of foam and then superglued to the template. That piece got set aside with the horns and I moved on to the next bits: the armor.
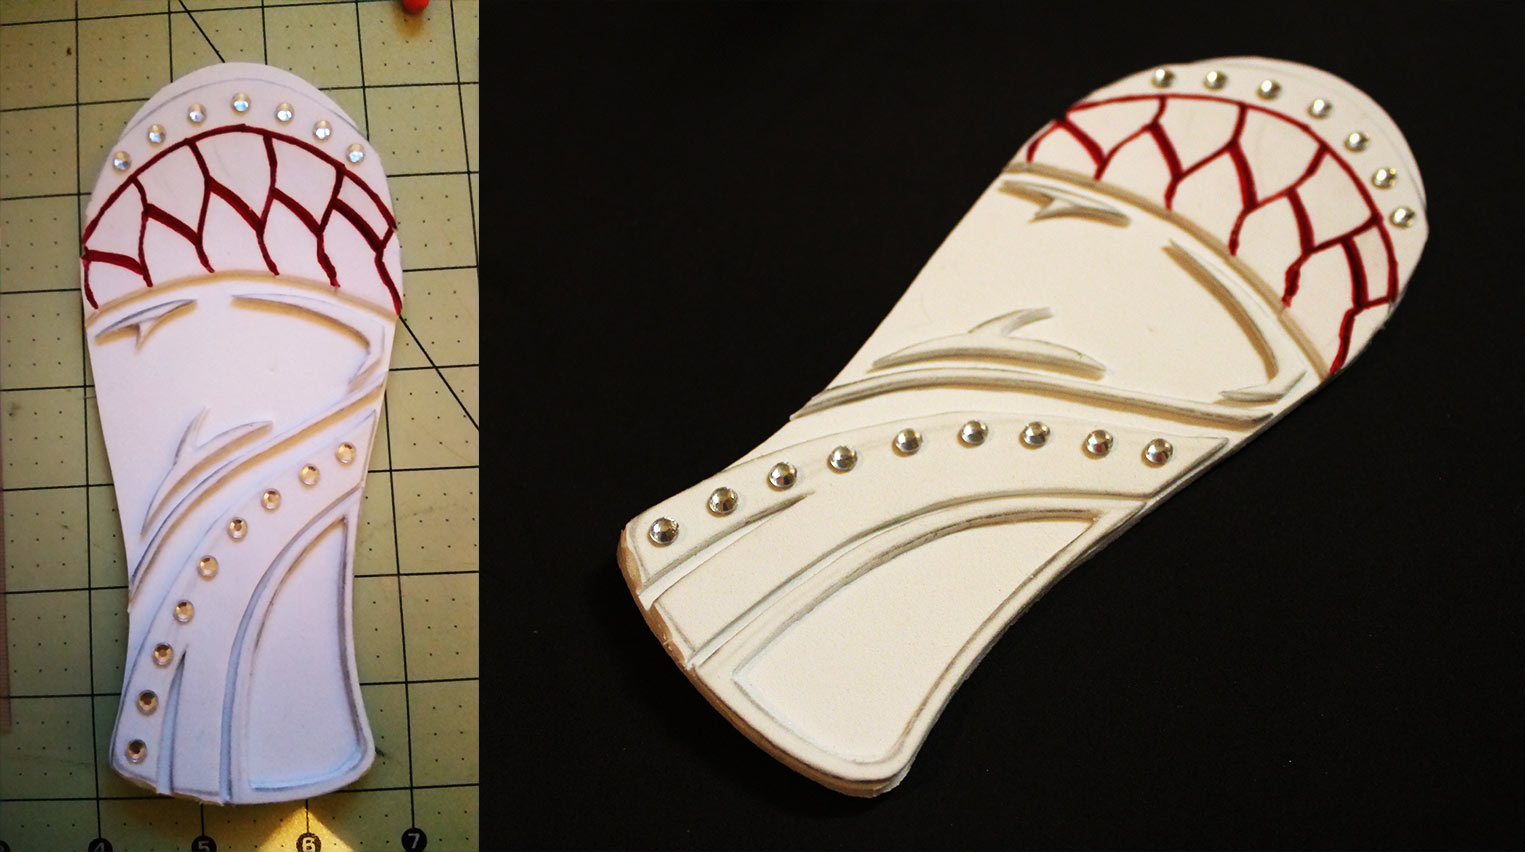
Loki has a lot of different pieces of armor depending on what you are using as source material. To save time, we went The Avengers route honestly just because it seemed to have less pieces than most of the others. To start, I had to size the bracer pieces to my daughter. We covered her arm in seran wrap and duct tape on which a basic template outline was drawn. After cutting it off, I used the template, drew some sketches to make a more detailed template that matched (as closely as my limited skills and timeline could manage) the screenshots from the movie, then transferred it and cut the pieces out of craft foam. The raised bumps were made using some of those little plastic jewels that you can find at hobby stores – everything else is just foam and superglue. Once I had one done, I just flipped the template over on another piece of foam, transferred, and made a mirror copy. I don’t know if there is a technical name for the armor pieces that are on the strap across his chest and the breastplate piece or not, but they were done in exactly the same way. Just foam, superglue, and more plastic jewels.
The shoulder piece was tricky. To begin with, it is super detailed. It is also a really odd shape. It turned out ok I think, but man… To start, I just googled “Loki Shoulder Template” and hit the images. Right off the bat I found a wonderful template on DeviantArt by HekateLesedi.
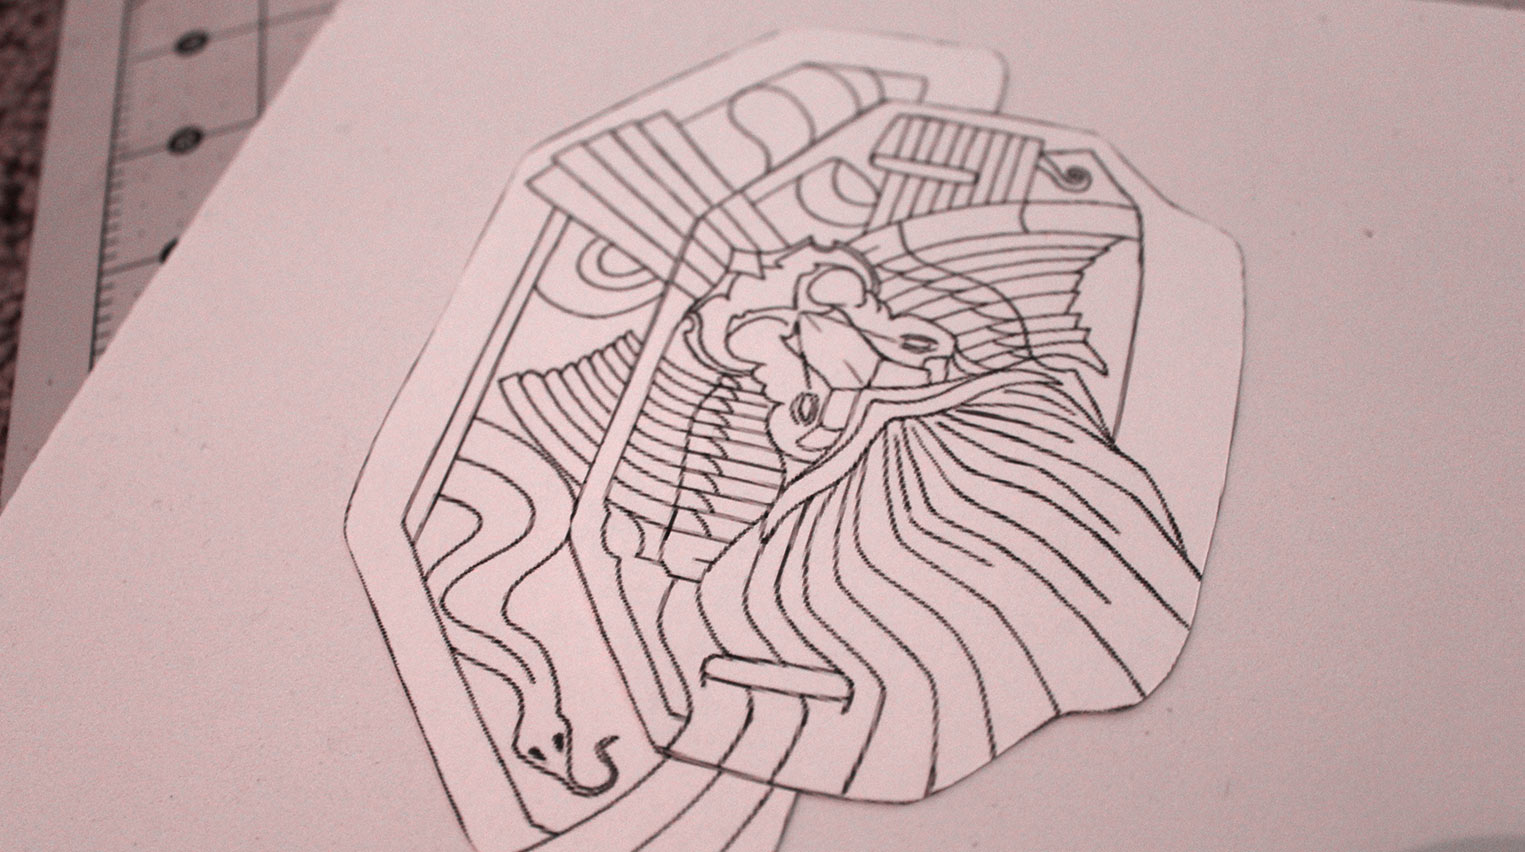
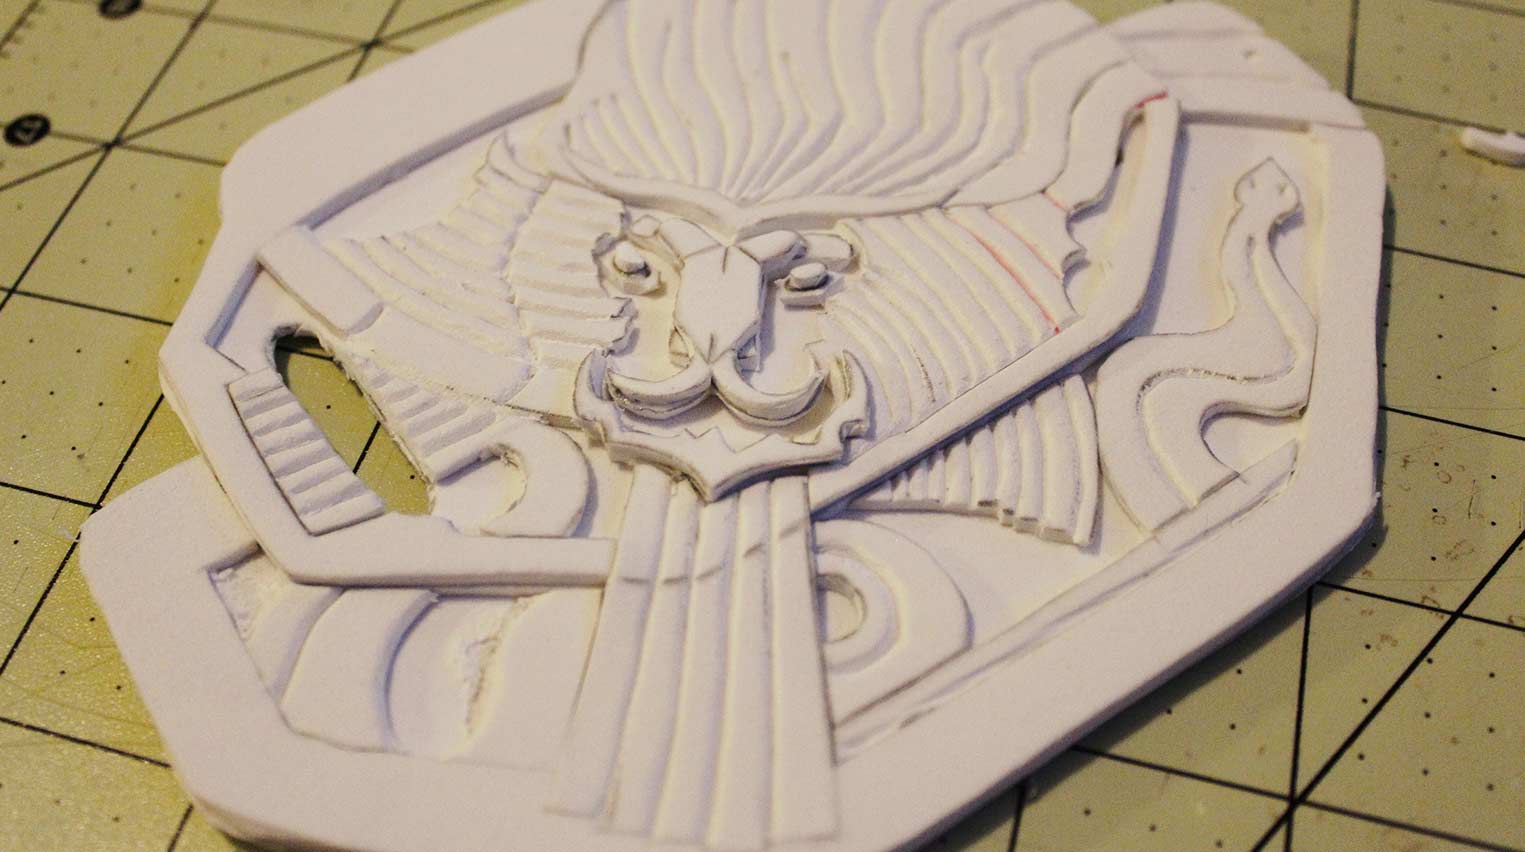
After a couple of rounds of printing, sizing it up on my daughter, re-sizing, and printing again, I finally got it to a roughly decent size. Since there is supposed to be quite a lot of depth to this piece (it’s supposed to be a couple of pieces on top of each other) I cut it in two and planned on stacking the pieces on top of each other. The whole thing was transferred over to craft foam, cut out, and glued together. Then I used the same template to cut out and glue all of the additional pieces that looked like they were supposed to have depth.
I wasn’t quite sure how I was going to get all of the little details to show up in the final piece, so with an x-acto knife I started trying to v-cut all of the lines that I’d just drawn as neatly as I could manage. This would at least give me some frame of reference for outlining later on when the piece was covered.
Now that I had all of the armor pieces completed in foam, it was time to start covering them in Worbla. For those who are unaware, Worbla is a thermoplastic material. When heated it becomes pliable and when it cools back down it is basically plastic. It comes in sheets of various sizes and can be purchased online at many different places. I was lucky enough that one of the comic book shops in the area carries it – so I popped over and picked up a large sheet. To heat this stuff, you will need a heat gun – a hair dryer doesn’t get hot enough and unfortunately will not work. Worbla is pretty easy to cut with a decent pair of scissors, but it is easier if you heat it first. Just try to work quickly because it cools off pretty fast.
*Important Note – While I was researching how I was going to pull this costume off, I came across CoreGeek Props YouTube page and immediately subscribed. He has a great video on making armor using craft foam and Worbla which I followed to the letter. In truth, pretty much this entire costume was planned around what this dude had to say because of his phenomenal results making a (much more impressive) Loki costume for his own child. If you are interested in this stuff and haven’t checked out his videos or webpage, do yourself a favor and close this tab and go check his stuff out – I promise you’ll learn more from him than you will from me.
Anywho… the process of covering was largely the same for most of the pieces of armor. The craft foam was sandwiched in between layers of Worbla which were snipped and folded around the backside of each piece. I used a combination of clay sculpting tools and the tools from an old iPhone repair kit to get into the creases and edges to make the details as sharp as I could manage. The shoulder piece was the trickiest part – primarily because I strayed from the formula. You see, depending on whose cosplay you look at, or which screencap you see online of the actual armor piece, they all seem to be slightly different. Some of them seem like the hair on the lion is kind of flat and some of them have it looking super raised. Without a physical piece to actually compare to, I just sorta winged it. Basically for the hair, I used the v-cuts that I had previously made and made indentations in the Worbla to serve as a guide. Then I cut loads of little pieces of Worbla, heated them up and formed them together like clay and attached them as closely as I could manage over my guidelines. I think the end result looks cool, but to be honest it is not anywhere near what the film version has it looking like. Also, because of the height of the hair on that lion, it threw off the look from the front – so the entire shoulder guard piece wound up getting switched to the other shoulder just so that you could see something besides the backside of a piece of hair. Epic fail. Ah well – it’s a learning process.
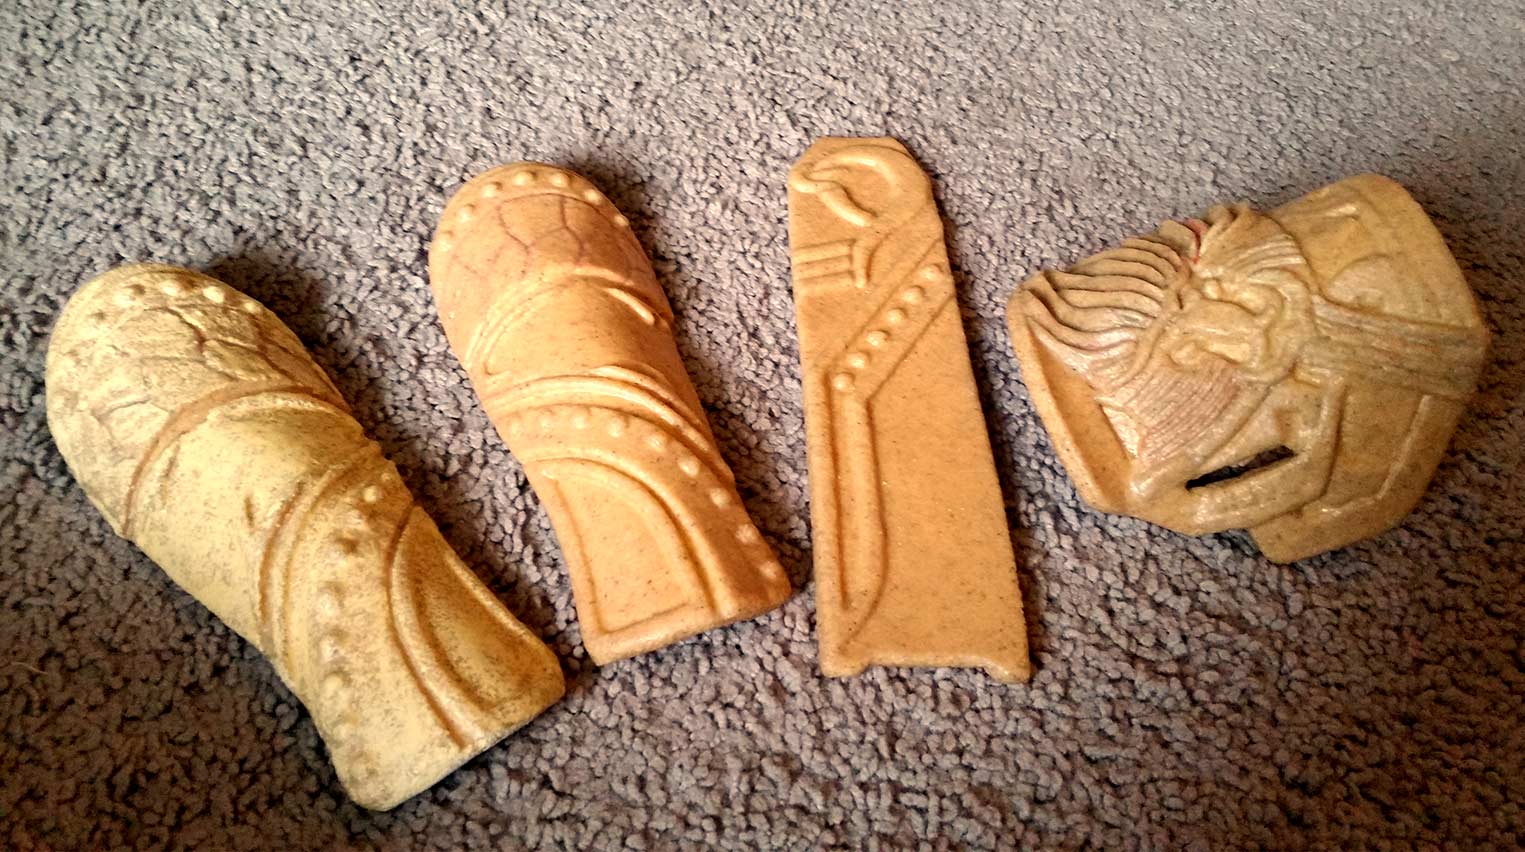
Worbla has a pretty rough texture – and obviously armor should ideally be smooth. So, after all the foam pieces were covered, detailed, and formed, everything was coated in about 5 layers of wood glue. Once the layers were dry, I noticed that they were still pretty rough. CoreGeek says he used wood filler to smooth his out, but at this point we were running into crunch time and I didn’t have a ton of time to do loads of sanding on all the armor. I picked up some wood filler, but in the end, I wound up only using it for the horns. I painted all of the armor pieces with several layers of gesso on top of the wood glue and went about sanding the gesso down – but alas, smooth armor was not meant to be. Time crisis though and since they won’t hold up Halloween on my account everything just got primed and painted. Not happy with it to be honest, but like I said, it’s my first go at this and my daughter loved it – so I guess that’s whats most important. After priming and painting, it dawned on me that I had no clue how to attach the bracers to her. In a particularly dumb moment, I thought, “Oh, I’ll just pop some eyelets through the pieces and use them to thread some straps through”.
Sigh.
Horrible idea. First off, I couldn’t find any brass eyelets. Only silver. Secondly, I used eyelets that were too large for the eyelet pliers that I had. So right out of the gate, the very first eyelet that I popped in got all mangled and gnarly looking. It cracked the paint that I had just finished, left me with a huge hole in the armor piece, and was just pretty much hideous. To top it off, I couldn’t get the eyelet out. So what did I do? The absolute most logical thing ever. I tried again. On the same bracer. I like to think I am a relatively intelligent individual… so I’m gonna go ahead and blame lack of sleep for my temporary insanity. Anyway, after fumbling it, I decided I didn’t have enough time to remake the whole thing. I would just have to do my best to make the two bracers match. So I dremeled out all the holes and simply superglued in the other eyelets. Then when I went to paint them, I couldn’t get the primer to stick to the metal. So I wiped it off and set the pieces aside because quite frankly I couldn’t bear to look at them anymore. So stupid.
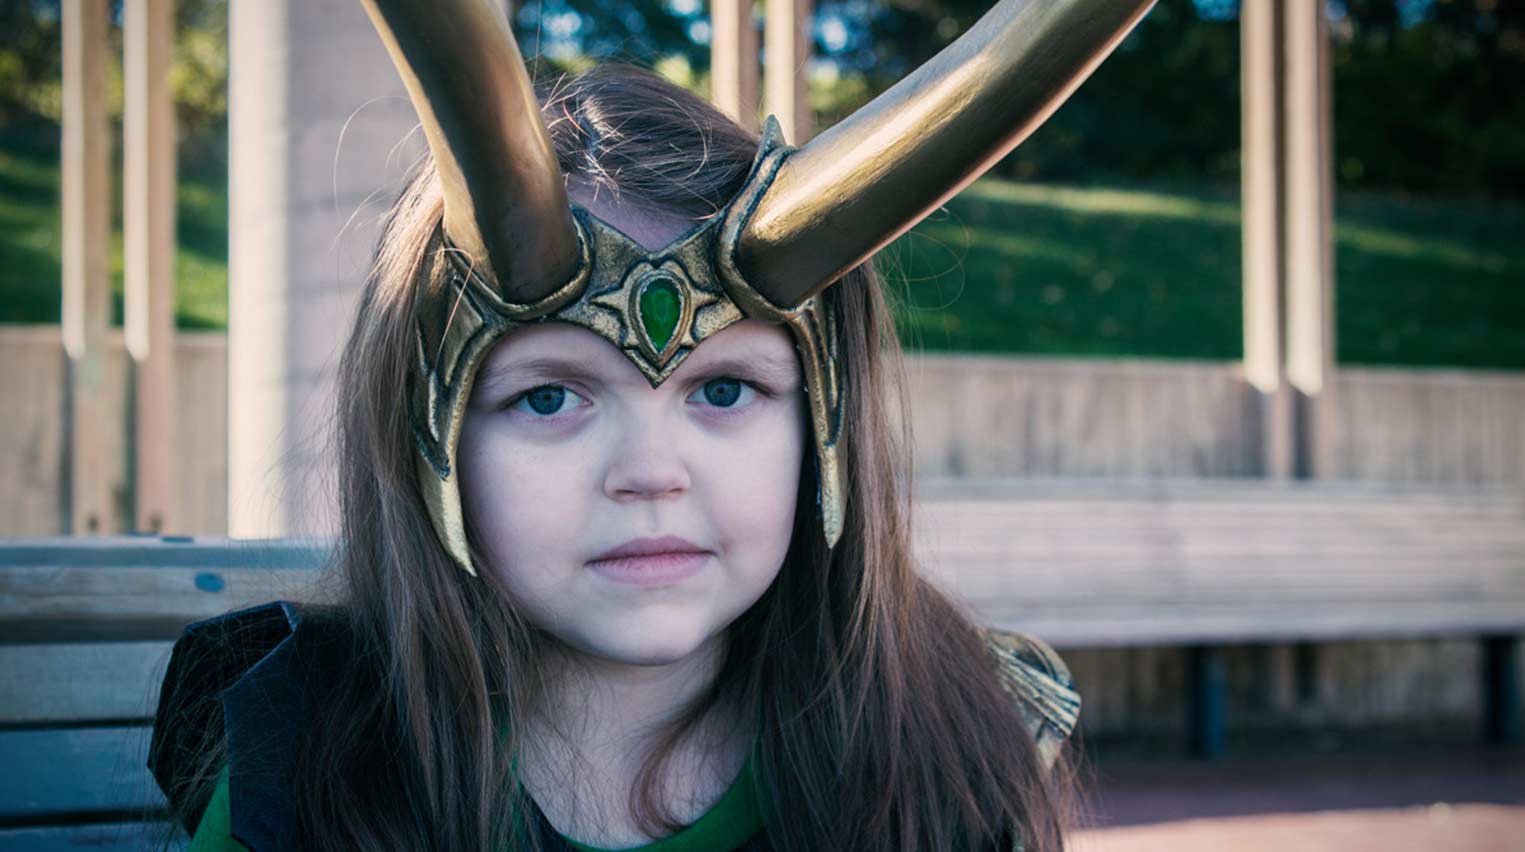
Went back to the headpiece. I decided I wanted to add a gem or something in the center of the crown – something to add a bit of visual interest. I have never made gems before, and of course it would have been easier to have just purchased some cheap gems from the store – but where is the fun in that? At this point there is only about a week until Halloween and the headpiece hadn’t been touched in a couple of weeks. I ran out to the hobby shop and picked up some clear resin and a large candy mold sheet that was all different gem sizes and shapes. I used a bit of vaseline in the mold to act as a release and set about mixing up the resin. Added 3 drops of green food coloring to the mix and poured the resin into the mold. In retrospect, I should have gotten the quick cure stuff cause the stuff I bought had a 24 hour cure time. That’s a lot of time to wait and see if you screwed something up or not. Luckily, everything worked out. I glued some tin foil on the back of the gem to help reflect the light through it. I didn’t get any pics of the gem itself, but you can see it in the final pics at the bottom.
Here’s the thing. The horns are made of foam. Foam melts when you get it too hot. And of course, if there’s a mistake that can be made, I’ll be the one to make it – wound up scorching the foam in a few places. To compensate, I pulled out the wood filler I had previously purchased and started applying coats. Gave them about 4-6 hours time to dry before sanding and it all worked out pretty decently. Several coats of gesso and lots more sanding and it was time to attach them to the headpiece. To do this, I screwed some drywall anchors into the base of the horns and drilled a couple of holes in the headpiece and simply screwed the horns in. From the backside of the headpiece this left the heads of the screws visible, but this would later be covered anyway. I only got about 4 coats of gesso added to the actual headpiece – and it shows. Note for next time – start making the costume earlier. Way earlier.
Now that everything was attached, I covered the gem in the center with some masking tape so it wouldn’t get ruined, then set about priming. After priming, several coats of paint were sprayed. Let me tell you something – if you have any scratches or imperfections, shiny paint sucks. Considering that none of the pieces of armor that I created were even remotely smooth, the roughness really shows up in the final pieces. Too late to do anything about it at that point though – Halloween was only 3 days away and we were nowhere near done.
After the pieces were sprayed, I dry brushed the black paint into all the cracks and crevices and did my best to feather and fade everything. I never said I was some brilliant traditional artist… so don’t judge me here. Before this, it’d probably been at least a couple years since I even picked up a paintbrush. Final result:
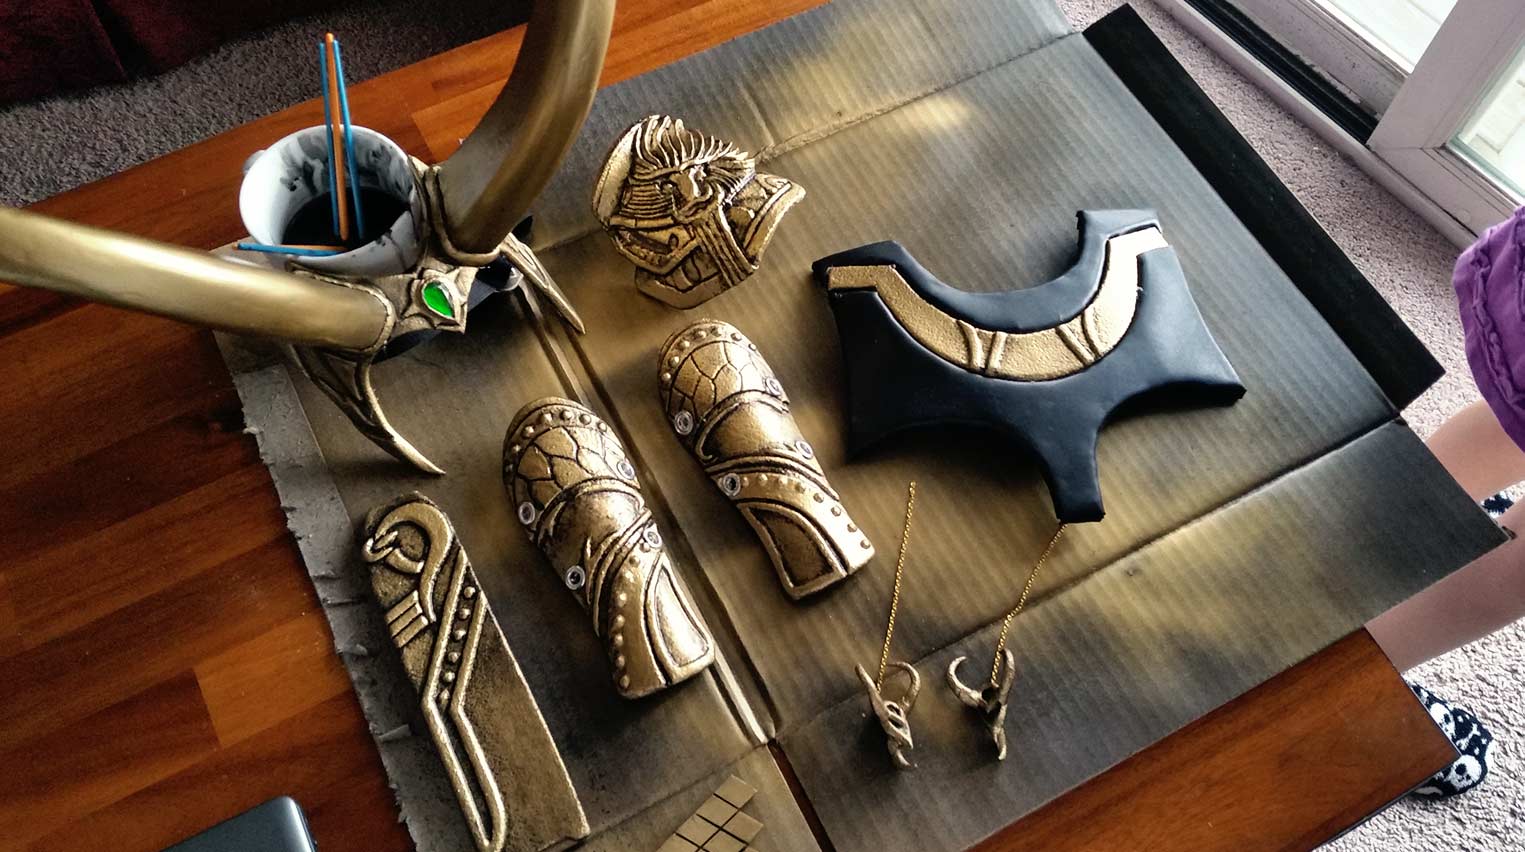
Not too shabby. Yes I am well aware that it’s still pretty shabby, but not overly so… work with me here.
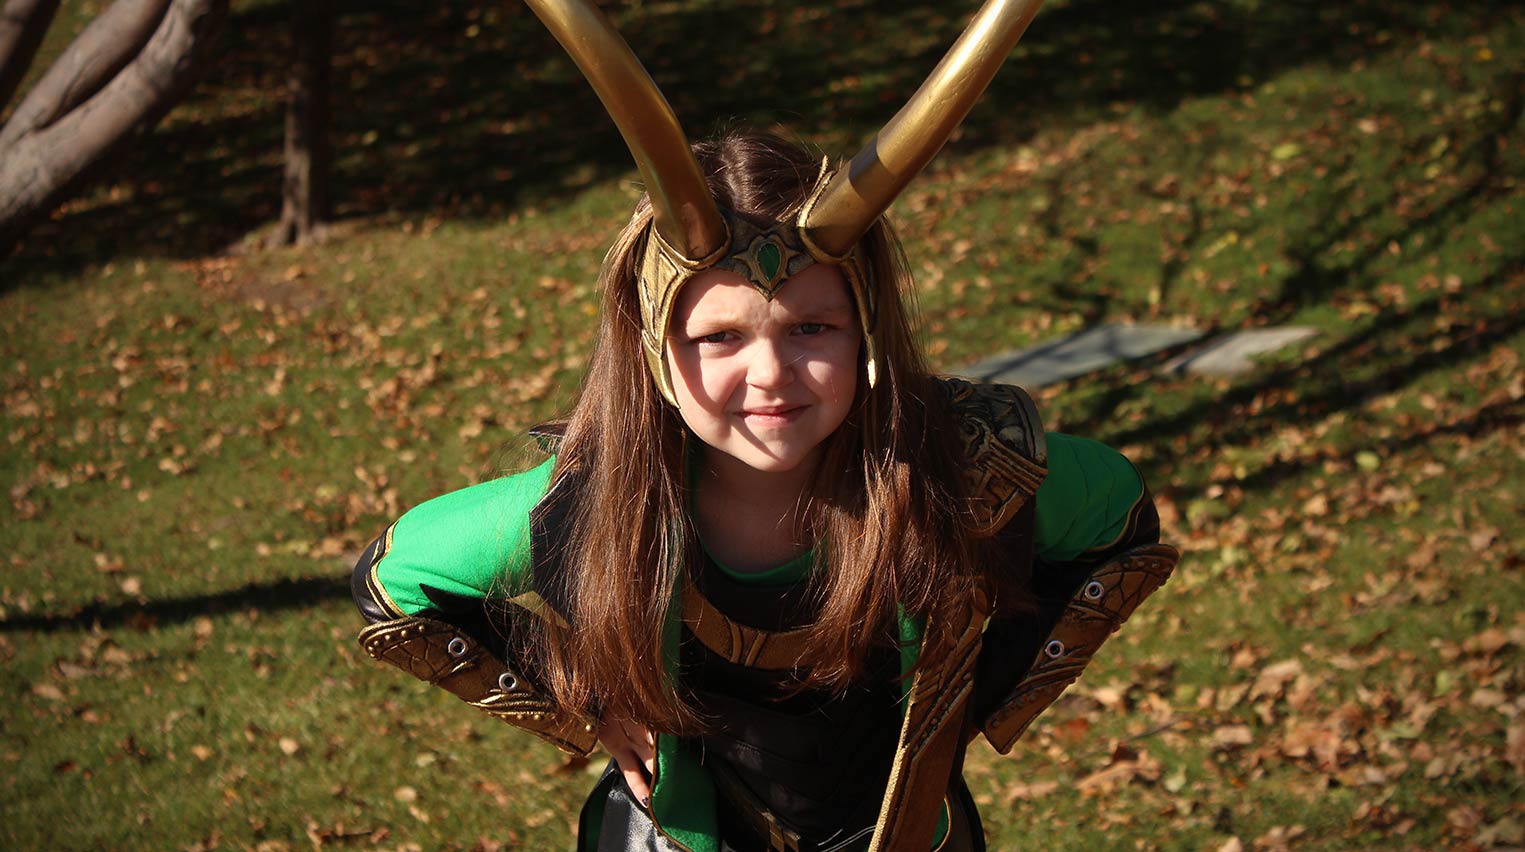
As I mentioned earlier, most of the rest of the costume was done by my wife. I did a lot of the straps and buckles and stuff, but all the fabric bits were up to her. As bad as I was about taking in-progress shots, she was worse. Not a single picture was taken. I’ll try to summarize the steps though as best as I can.
First she gathered TONS of reference images and went to the fabric store to purchase a load of green fabric. Where we live it gets pretty cold on Halloween, so the inside of the coat was lined with green fleece and cotton. I had a leather coat hanging in the closet that had managed to get a hole in it a few years back, so the decision was made that this coat would get cut up and become all of the leather pieces for the costume. She took tons of measurements of my daughter and used half a pad of tracing paper making the pattern for the costume. The rest of it was magic. We wound up attaching the armor pieces to the costume with velcro and superglue and finished the whole thing about 30 minutes before we were supposed to meet friends for trick-or-treating. Cut it super close – but pulled it off.
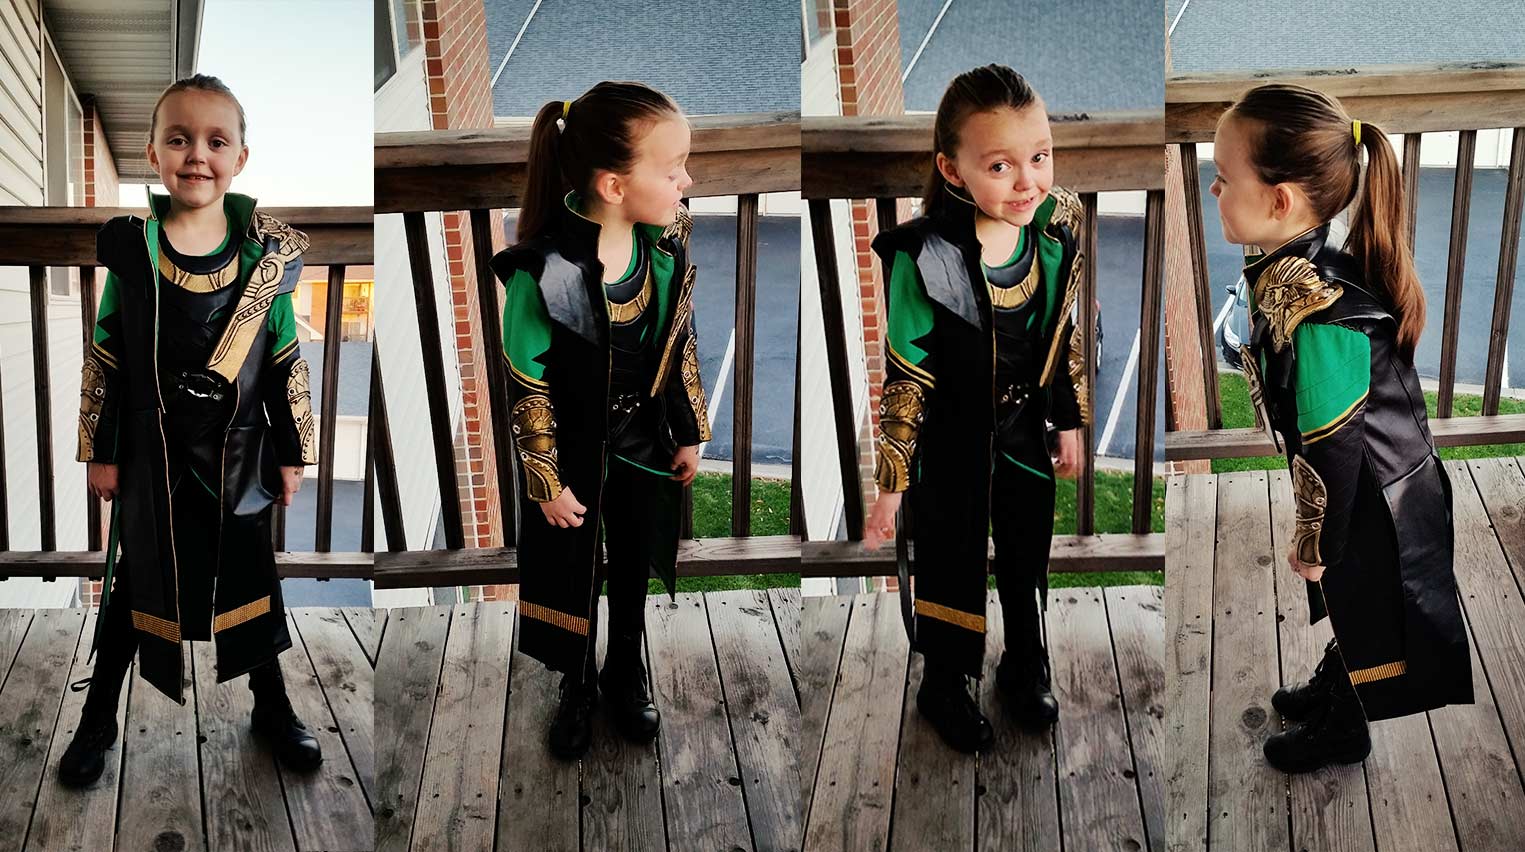
After this whole thing, I can honestly say that I have so much more respect for people who do this on a regular basis. I don’t think people realize sometimes the amount of work that goes into painstakingly getting in all the details and everything just right unless they have actually tried it. I know that was the case for me anyway. My experience was a bit painful at times and I didn’t do it at nearly the same level as so many of the ridiculously talented cosplayers and prop builders out there. So, to all of you who have inspired, my hat is off to you – and if I ever am lucky enough to meet you, drinks are on me for all your help in making my little girl happy!